How does SCOM 2022’s Native Microsoft Teams Integration Work?
Good news! SCOM 2022 contains a native integration with Microsoft Teams, replacing the old Skype for Business integration! Once set up, you can expect notifications like the below one in Microsoft Teams channels as desired:

This integration, like all other notifications and subscriptions, allows you to filter the SCOM alerts sent based on Scope (SCOM group and/or class) and Criteria (SCOM alert properties/attributes), you can use all these elements to define what is sent to Teams.
This functionality allows a schedule to be created so you can specify what time of day alerts should be sent to Teams. It will then send a new notification when any property of a SCOM alert changes (e.g. when an alert moves between states), unless filtered with criteria. However, it has no bi-directional sync, so has no ability to close alerts from Teams notifications.
Getting Started:
Firstly, you will need to create an Azure Active Directory (AD) App, so before you get going you need to complete the list of pre-requisites below:
Pre-requisites:
1. Azure AD access to create a service account and set up an Azure AD Application.
2. An Azure AD Application with access to Identity Management + Graph API - this will be used by SCOM to access Teams in your Microsoft 365 subscription.
3. A service account to be used by SCOM to send Teams notifications. This account needs:
a. A Teams license
b. To be a member of the Team you want to send SCOM alerts to
c. Must have multi-factor auth disabled.
Setting up SCOM 2022’s Teams Integration
These instructions are split into a few parts based on where the setup steps need to be completed:
Creating an Azure AD Application
SCOM will need an Azure AD App to be created with permissions to some components of Teams to be able to send notifications to it.
1. Navigate to portal.azure.com then to Azure AD
2. Click App Registrations and then click New registration

3. Give your App a name and define Supported account types.

4. Make a note of the ‘Application (client) ID’ and ‘Directory (tenant) ID’ as these are the details you will need to input into SCOM later when setting up your notification channel.

5. Go to API permissions and hit Add a permission, then select ‘Microsoft Graph’

6. Select ‘Delegated Permissions,’ then search for ‘channelmessage’

7. Select the ‘ChannelMessage.Send’ permission from the results returned.

8. Hit ‘Grant Admin consent for x’ to grant these permissions for all accounts in your organisation.
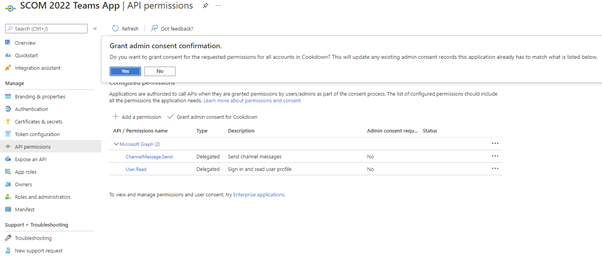
9. You should see a confirmation message like the one below if the grant has been successful.

10. Click ‘Authentication’ and select Yes to Allow public client flows, then hit Save.

Well done, you have now setup your Azure AD App and are ready to dive into SCOM.
Create Run As Account in SCOM
For SCOM to be able to send messages to Teams, it needs a Run As account and Profile. The setup steps for this are the same as with any other Run As account/profile, select Basic auth when select your account type and save the Profile into the MP ‘Notifications Internal Library’:

If you store the profile anywhere else, the Channel setup process will not work as the profile will not be available for selection in the Channel setup wizard. Instructions to create a new Run As account and Profile here.
Create Notification Channel
A Notification channel is required to point SCOM at the destination for your SCOM alerts, Subscriptions and Subscribers then layer on top to route the specified alerts to a specific group or person. In the case of Teams, the notification channel specifies account details + details of the Azure AD App, we created earlier in the setup steps.
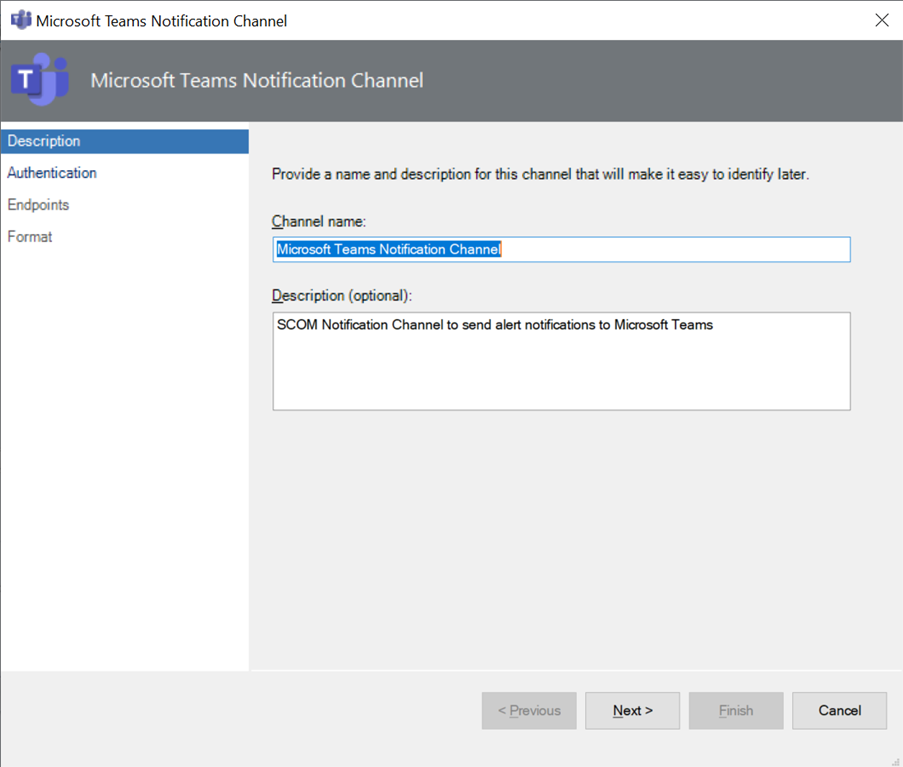
1. In the Administration pane navigate to Notifications > Channels, right click and select ‘New Channel’ > ‘Microsoft Teams…’

2. Give the channel a name and description.
3. Input your Tennant ID and Client ID from your Azure AD App created earlier, then select a Run As profile to use (note: only profiles in the ‘Notifications Internal Library’ are shown in the dropdown).

4. Input your authorization URL and Graph API URL. These will be as per the defaults for all except Azure government customers.

5. Define the message format using JSON, you can find out more about this here, or accept the defaults and hit Finish.

Create Subscriber
In the Subscriber you are about to create, you tell SCOM which Microsoft Teams team/channel combo you would like to send SCOM alerts to, along with the schedule on when alerts should be sent.
1. In Microsoft Teams, navigate to the channel you would like to send SCOM alerts to, click on the three dots in the top right corner and click ‘Get link to channel’ – the link copied will be used in the subscriber setup by SCOM.

2. Navigate to Administration Pane > Notifications > Subscribers & click ‘New…’ to create a new Subscriber.
3. Input a Subscriber name (just as with any other Subscriber) and hit Next.
4. Input a Schedule (just as with any other Subscriber) and hit Next.
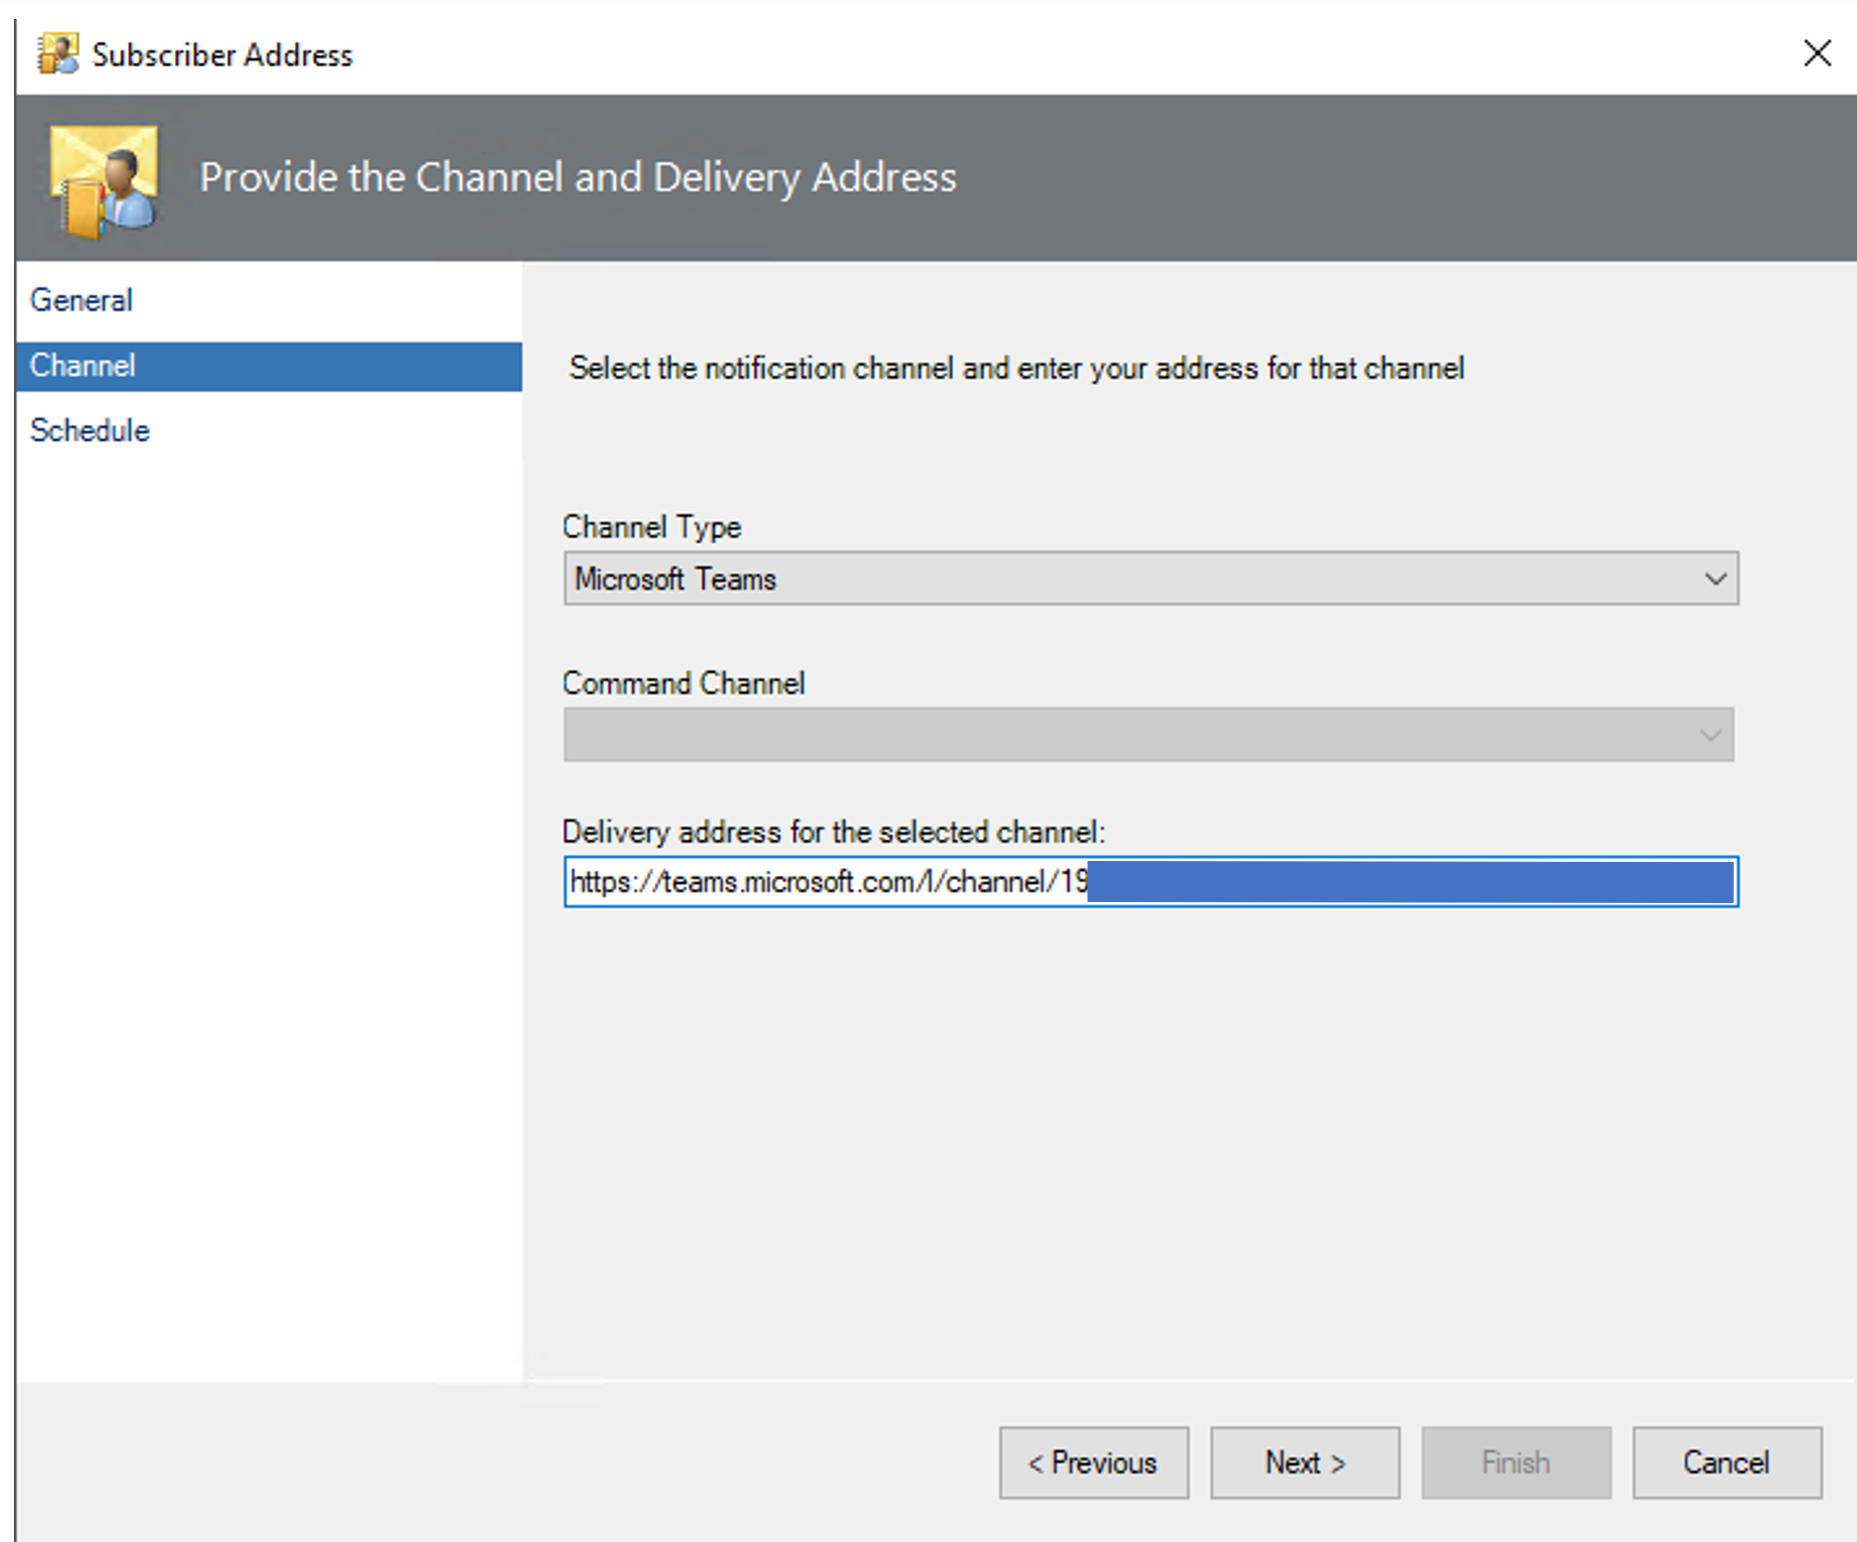
5. On the Addresses section of the Wizard, hit Add, input a name and hit Next.
6. Select Channel type of Microsoft Teams and in the ‘Delivery address for the selected channel’ paste the URL of the Teams channel you want SCOM to send notifications to, then hit Next.
7. Input schedule and hit Finish which will take you back to the main Notification Subscriber Wizard, hit Finish to complete the process.
Create a Subscription
The Subscription we are about to create will pull together the Subscriber we just setup and the Connector we setup earlier, and allow criteria to be layered on top (just as with all other Subscriptions). The process here is the same as with creating a Subscription for any other purpose, there is nothing unique to the process for Microsoft Teams. Full steps for this are on the Microsoft docs site here.
The finished product
There are no surprises on what the finished product is – notifications in the Teams channel you setup.
Note: that the name the notifications are sent from is the display name of the Azure AD account you setup as a SCOM Run As account.
Want to integrate older versions of SCOM with Teams?
So, although Microsoft’s Team integration is great for those of you upgrading to or already on SCOM 2022, there are a couple of options available for those wanting to integrate MS Teams with older versions of SCOM.
1) Opslogix - SCOM Connector for MS Teams
This tool certainly offers superior functionality providing bi-directional data sync so you can close alerts and see performance graphs from SCOM in Teams. However, as it runs as an Azure Managed App the setup is not as simple, there are a couple of pre-requisites:
a) To allow the connector to read information from Microsoft Graph, the user installing the app needs to have an account that is Global Administrator, Application Administrator, or a Cloud Application Administrator in your Azure Tenant.
b) Alternatively, you can grant end-users permission to use applications from verified publishers.
This service is charged on a PAYG monthly subscription (from €199/month), so is fairly competitively priced. To find out more go to: www.opslogix.com/scom-connector-for-microsoft-teams
2) Cookdown Connection Center – Teams Integration
This plug and play application enables you to connect SCOM 2012 R2+ and Teams in just a few clicks – making it super simple to setup, with few permissions and no additional apps to install. The screenshots below illustrates how sleek the notifications look using our integration vs. the clunky MS Teams Integration.


Prices start from just $2,000/year and are based on the size of your SCOM management group. To find out more about how it works, pricing or to download a free 30-day trial just go to: www.cookdown.com/connection-center-teams
If you want to find out more about SCOM 2022’s new features, you may also want to take a look at our blog on ‘SCOM 2022 - New Delegated Administrator Role Customisation Function’.